How to Program Raspberry Pi Pico with Arduino IDE – Steps for Installation and Uploading Example Sketches
Raspberry Pi Pico is an RP2040 microcontroller development board from the Raspberry Pi foundation. RP2040 is a 32-bit ARM Cortex-M0+ dual-core microcontroller running at 133MHz. It is the first microcontroller developed in-house by RPi. The Pico is a minimal development board in the form factor of a 40-pin DIP (Dual In-line Package). Applications for RP2040 can be written and compiled using the official C/C++ or MicroPython SDKs. RP2040 is also supported by the Arduino platform, through the Arduino MbedOS Core. In this post, we will see how we can install the required Arduino software packages for RP2040, and compile and flash your first program.
All you need is a Raspberry Pico board, a Micro-USB cable, and a computer. A tweezer or jumper cable will also come in handy later. We will be only showing the installation steps for a Windows 10 PC. For Linux and Mac systems, you can follow the official documentation. But do not worry, most of the installation steps are identical or intuitive enough to follow.
We will show installation steps for both classic Arduino IDE 1.8.x and the new Arduino IDE 2.0. We recommend you try out the modern IDE, and yes, you can install both the classic and modern IDEs in your system at the same time. If you are new to the RP2040 microcontroller and the Raspberry Pi Pico board, we have a getting-started tutorial for you.
Getting Started with Raspberry Pi Pico : RP2040 Microcontroller Board – Pinout, Schematic and Programming Tutorial
Uploading RP2040 sketches through Arduino IDE 2+
1. Installing Arduino IDE 2
Installing the Arduino IDE is a straightforward process. Download the IDE 2 from the official download page and follow the instructions found on this tutorial page.
2. Opening Boards Manager and installing RP2040 Mbed OS packages
Open the Boards Manager from Tools → Board → Boards Manager, or you can find an icon of an IC package on the left of the window.
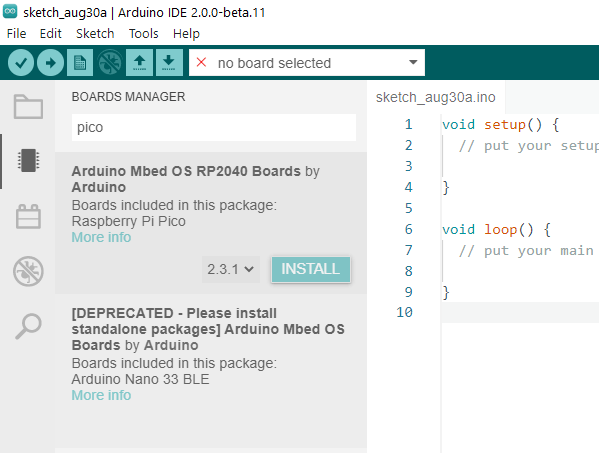
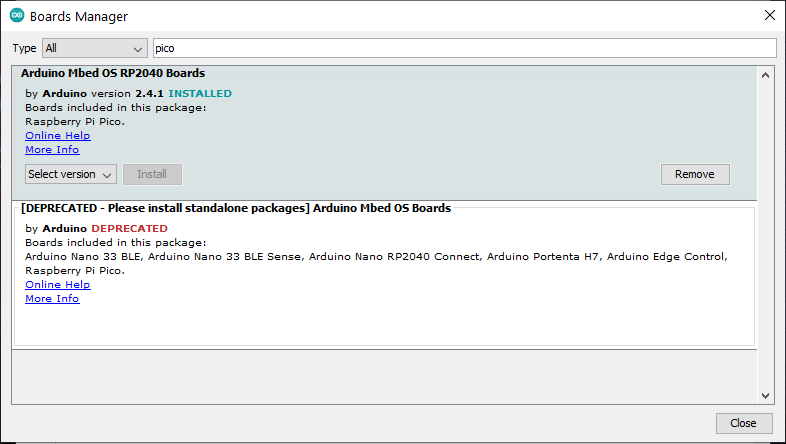
Once you have opened the Boards Manager, search for “pico” keyword. It will bring up a couple of results. From the list, install the Arduino Mbed OS RP2040 Boards by Arduino. You have the option to choose the version. Choose the latest version and click Install. Your computer needs an internet connection for installing the packages. Once you click install, the packages will be downloaded automatically and a notification will pop up on the bottom-right of the screen.

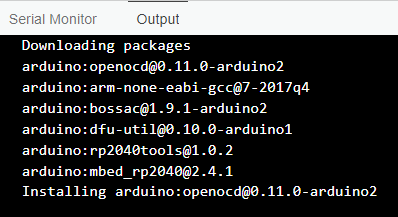
It might take a while to completely download the package. Around 300MB will be consumed at this stage. As the installation progresses, you will be asked to install two drivers. Click on Install button for both prompts.
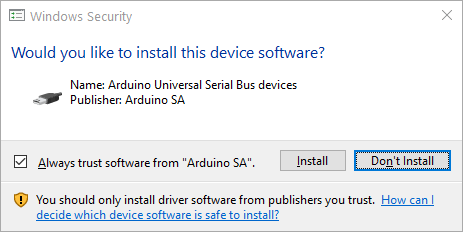
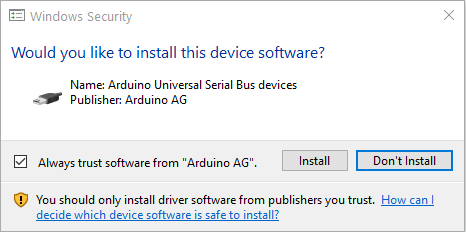
Once the installation is complete, you will see a new notification on the bottom-right.

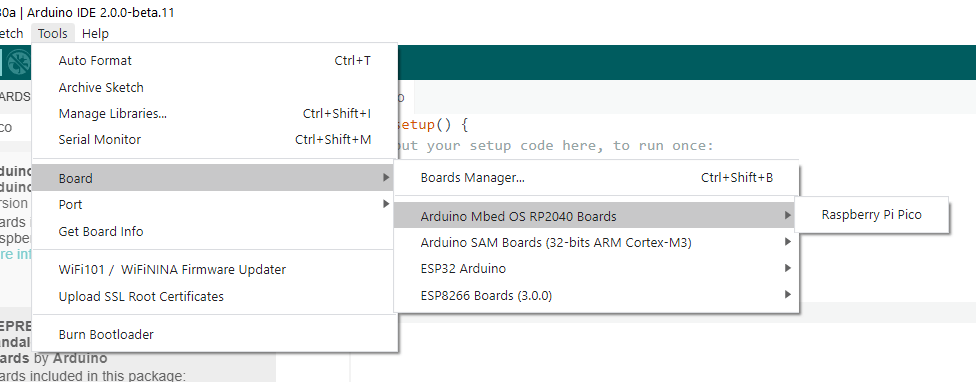
Now if you open the Boards Manager again, you can see the Raspberry Pi Pico present on the list. Continue by choosing it.
3. Connecting to computer and uploading the program
When you first connect your Pico to a computer, there will be no sign on your computer that it is connected. The Pico’s LED may be flashing if it is receiving power from the USB port. The program to flash the LED is uploaded during factory testing. So without a serial port or a dedicated programmer, how are we going to upload our code to Pico?
Well, there are two ways to upload your compiled code to the Pico.
- Through the Serial Wire Debug (SWD) interface: this requires an external programmer that can be connected to the SWD pins of your Pico at one end, and a computer to the other end. This interface is also used for debugging your applications.
- Through USB: the RP2040 has an internal USB peripheral and a 16KB of Read-only Memory (ROM) that contains instructions for enumerating the USB port and accepting data from it. The ROM is programmed during chip production, so you don’t have to worry about losing it.
If you remember now, the RP2040 has no flash memory inside the chip. The program has to be loaded from an external source. However, RP2040 has the ability to load instructions from a flash memory connected to its dedicated QSPI bus or directly from the USB. To facilitate this, we have a dedicated button called BOOTSEL (Boot Select) on the Pico. When you press this button, the Chip Select (CS) pin of the on-board flash memory is deactivated. You have to do this before applying power to the board. When you do it, the MCU can no longer load instructions from the Flash chip and thus it switches to what is called the USB Mass Storage mode. Simply, the Pico will appear as a flash storage device with a non-realistic capacity as you can see below.

You can drag and drop or copy-paste a UF2 file to this drive and the file will be written to the Flash chip and Pico is reset, and disconnected from the PC as a storage device. The next time you boot Pico, it will start executing this program from the Flash. This also means that you have to press the BOOTSEL button every time you want to upload code to your Pico, which is a tedious task. But do not worry, Arduino takes care of this problem in a better way.
To show how it is done let’s open the example Blink sketch and compile it. The interface of IDE 2 is near identical to that of IDE 1. So you get the buttons like Verify, Upload etc. at places where you would expect them to be. Open the Blink sketch and compile it by pressing the Verify button, so that we can ensure the installed software package is working. When the compilation is complete, you will see the "Done compiling" message with the information about the binary size.

If the compilation is successful, we can start uploading the binary file to Pico. But there’s a problem. Arduino IDE expects a Serial COM port to send the binary file. But connecting Pico does not create a COM port at the moment, and therefore the port list will be empty as you can see below. Open this window by choosing the "Select Other Board & Port" option from the drop-down list.
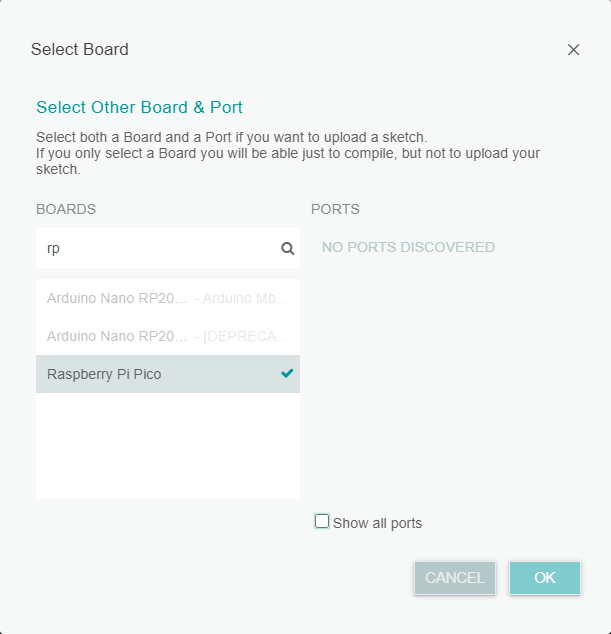
Why this is because the RP2040 on the Pico is not yet able to enumerate its USB peripheral as a CDC (USB Communications Device Class) serial port. If you try to press Upload button now, the following error will show up, saying,
Error: Request upload failed with message: 2 UNKNOWN: uploading error: uploading error: exit status 1
So we need another method to upload our program. For that, press the Upload button again and wait for the compilation to complete and for the following message to show up on the console.
rp2040load 1.0.1 - compiled with go1.15.8
...When the period characters start to appear,
- Press and hold the BOOTSEL switch.
- Simultaneously short the RUN pin to GND with the help of a tweezer or anything conductive.
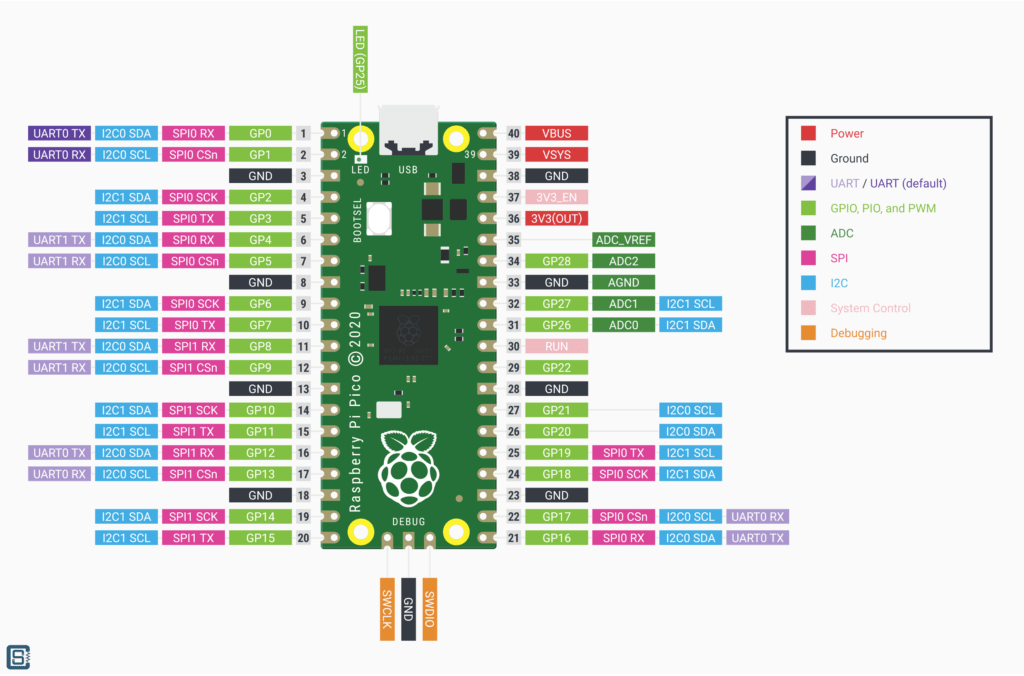
Immediately, the Arduino IDE will detect the Pico and start transferring the binary file to the flash memory. The whole console message will look like below.
Sketch uses 79272 bytes (0%) of program storage space. Maximum is 16777216 bytes.
Global variables use 52660 bytes (19%) of dynamic memory, leaving 217676 bytes for local variables. Maximum is 270336 bytes.

--------------------------
Compilation complete.
Performing 1200-bps touch reset on serial port COM6
"C:\Users\Vishnu Mohanan\AppData\Local\Arduino15\packages\arduino\tools\rp2040tools\1.0.2/rp2040load" -v -D "C:\Users\VISHNU~1\AppData\Local\Temp\arduino-sketch-88152CDDF864A3B175D2C4A6BC2FF753/Blink.ino.elf"
rp2040load 1.0.1 - compiled with go1.15.8

....
Loading into Flash: [                              ]  0%
Loading into Flash: [=                             ]  4%
Loading into Flash: [==                            ]  9%
Loading into Flash: [===                           ]  13%
Loading into Flash: [=====                         ]  18%
Loading into Flash: [======                        ]  22%
Loading into Flash: [========                      ]  27%
Loading into Flash: [=========                     ]  32%
Loading into Flash: [==========                    ]  36%
Loading into Flash: [============                  ]  41%
Loading into Flash: [=============                 ]  45%
Loading into Flash: [===============               ]  50%
Loading into Flash: [================              ]  55%
Loading into Flash: [=================             ]  59%
Loading into Flash: [===================           ]  64%
Loading into Flash: [====================          ]  68%
Loading into Flash: [=====================         ]  73%
Loading into Flash: [=======================       ]  77%
Loading into Flash: [========================      ]  82%
Loading into Flash: [==========================    ]  87%
Loading into Flash: [===========================   ]  91%
Loading into Flash: [============================  ]  96%
Loading into Flash: [==============================]  100%


--------------------------
upload complete.
That’s it. Your Pico will now be blinking again and a COM port will appear on your system.
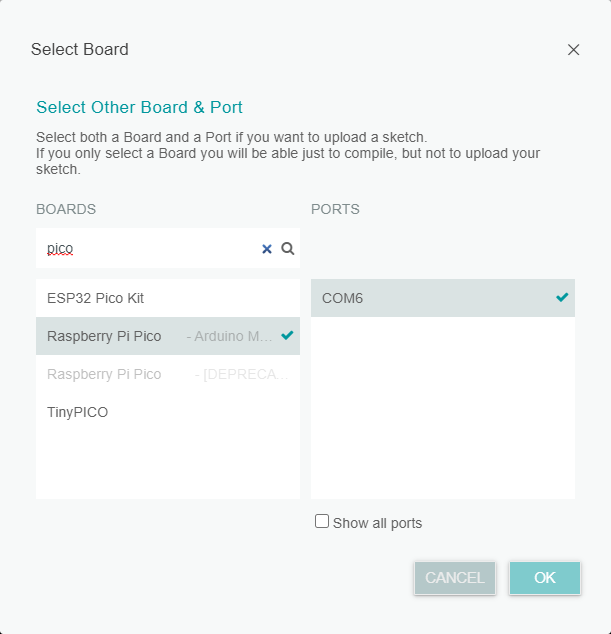
From now on, you don’t need to press the BOOTSEL button every time. Simply select the serial port associated to your Pico and press Upload button. Your binary file will be copied to Flash and Pico will be reset.
Uploading RP2040 sketches through Arduino IDE 1
If you have already installed the RP2040 Arduino packages via IDE 2, it will now show up on your IDE 1 also.
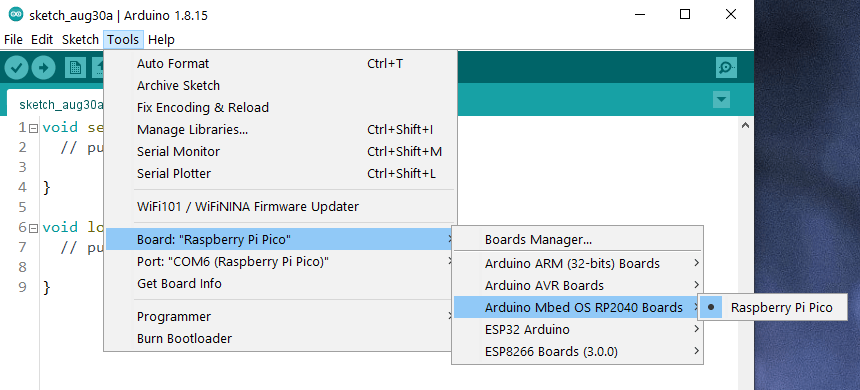
If not, you can open the Boards Manager and again search for “pico” and install the latest package. Code uploading instructions are the same here.
In the upcoming tutorial, we will see more examples demonstrating various peripherals of RP2040 microcontroller. Stay tuned. If you’re stuck with something, feel free to ask them in the comments below.
Links
- RP2040 Datasheet
- Hardware design with RP2040 – Using RP2040 microcontrollers to build boards and products
- Raspberry Pi Pico Datasheet
- Raspberry Pi Pico – FAQ Forum Thread
- Getting started with Raspberry Pi Pico – C/C++ development with Raspberry Pi Pico and other RP2040-based microcontroller boards
- Raspberry Pi Pico C/C++ SDK – Libraries and tools for C/C++ development on RP2040 microcontrollers
- Raspberry Pi Pico Python SDK – A MicroPython environment for RP2040 microcontrollers
- Raspberry Pi Pico Doxygen Documentation
- Frequently Asked Questions (FAQ)
- Pico pinout diagram in PDF format
- Pico Fritzing part
- Pico PCB design files
- Pico PCB 3D STEP file
- Get Started with MicroPython on Raspberry Pi Pico – PDF
Buy Pico RP2040 (India)
- Robu.in
- Silverline Electronics
- Electronicscomp
- Tomson Electronics
Short Link
- Short URL to this page – https://circuitstate.com/ardpicou




For me it is not working. Even when I press the button and short RUN to GND I get the same message that upload failed as before.
Are you able to put the board in Mass Storage Mode by pressing the BOOTSEL button and plugging in the board at the same time? This is the first step to test if you have a working board or not.
[…] Tutorial on installing RP2040 Mbed OS packages through Arduino IDE, compiling and uploading sketches to Raspberry Pi Pico microcontroller board. […]